I worked on this some more after all, and since it hasn't been officially critiqued yet I will probably end up changing it afterwards again... but I am happy with the changes thusfar.
Thursday, December 13, 2012
Monday, December 10, 2012
Process Pt. IV: Now in Technicolor
Hello internet! Barring some final touchups the societty piece is just about done! So it is time to talk about color.
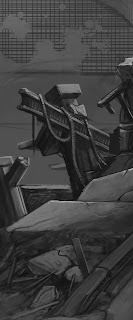
Before I start mucking about with color I always give the underpainting a once over to check for composition or continuity mistakes. In this case I noticed that the old background was creating some lighting problems, and was also directing the viewers eye away from the parts of the piece I wanted. To solve both problems I shifted the whole background to the left and knocked out a wall. Now the hanging lights and perspective on the roof lead us to the robot and the flower, and there is a nice light source to backlight the robo.
For the color, I simply chose a scheme, created a new layer set to Multiply, and roughed in the hues I wanted. Since the underpainting is pretty tight this stage can be pretty messy, so this only took around an hour of fiddling once I nailed down what colors I needed.
To add some interest and warm up the robot's overall color I added some decals, originally I was thinking warning strips but they were a bit garish so instead he got whatever these are...
And a bonus shot just to show how loose the color really is under all this here are the color layers set to Normal.
Before I start mucking about with color I always give the underpainting a once over to check for composition or continuity mistakes. In this case I noticed that the old background was creating some lighting problems, and was also directing the viewers eye away from the parts of the piece I wanted. To solve both problems I shifted the whole background to the left and knocked out a wall. Now the hanging lights and perspective on the roof lead us to the robot and the flower, and there is a nice light source to backlight the robo.
 | |
| The updated underpainting |
 | |
| base color |
 | |
| With markings |
And a bonus shot just to show how loose the color really is under all this here are the color layers set to Normal.
 |
| fugly eh? |
Monday, December 3, 2012
Process Pt. III: Detailing
Progress! Slowly crawling towards the finish, next week will be a big update with the coloring and touchup stage. For now some detail shots!
Subscribe to:
Comments (Atom)


